Many types of mushrooms make a healthy and delicious addition to a meal. Some even have…
A Guide to Growing Your Own Mushrooms
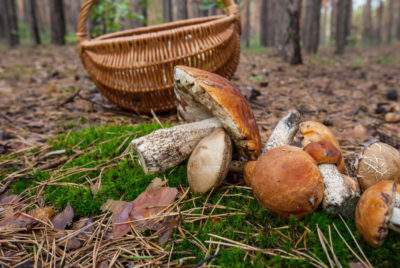
Foraging for mushrooms is a fun experience. But, it can also be exhausting and sometimes even frustrating – you can spend an entire day looking and still come home with nothing.
Heading to the grocery store to pick up mushrooms is a far easier option. But, these days, quality is always a question mark, let alone the source.
Luckily for us, there’s an excellent third option: growing mushrooms at home.
By taking matters into your own hands, you gain control over everything, from the exact conditions the mushrooms grow to their variety.
No more having to scour the woods when you have delicious morels just waiting for you in your back yard. And certainly, no more doubts if that chanterelle is really a chanterelle or an imposter Jack O’Lantern.
If you do more than cook with them, growing your own mushrooms gives you easy access to some of the best medicinal mushrooms too.
So, where do you start? With this introduction right here.
The 5 Steps for Growing Mushrooms
The process of growing your own mushrooms is surprisingly simple. Regardless of what species you want to focus on, the steps will generally be the same.
Pick the Mushroom Type
Your personal preference should ultimately be a strong influence over the type of mushrooms you grow. Pick ones you like to eat or have other uses for.
Some of the more popular options include wine cap, shiitake, lion’s mane, or even the mushroom of immortality – the reishi. While any one of these is a great choice, most beginners like to start with oysters.
Oyster mushrooms are relatively easy to grow and tend to. That makes them an excellent mushroom on which to learn the ropes. Once you get the hang of what it takes to grow oysters, it’s a lot easier to take on the more challenging species.
Get the Spawn
After deciding on the mushroom type, it’s time to get the spawn – the mushroom equivalent of a seed. There are a few ways you can go about it, but the easiest by far is to buy them from a retailer.
At least a few specialized plant stores in your area should carry mushroom spawn. Alternatively, there are also several excellent places where can buy spawn online. I find the latter a little easier, and indeed, most beginners favor this option as well.
Once you become a more experienced mushroom grower, you may decide to cultivate your own spawn from a spore. It’s an advanced technique that uses an existing mushroom to create a spore print.
But, while starting from spores is definitely something to keep in mind for the future, initially, you’ll have a much easier time going with a spawn.
Pick the Substrate
A substrate is simply the material your mushrooms will grow on. It’s the next thing you need to decide on once you have the mushroom spawn.
The kind of substrate you should use will depend on the species of mushroom you’re growing.
If you have opted to start with oysters, as recommended, you’re in luck. They can grow on just about anything. You can cultivate oyster mushrooms on straw, wood shavings, wood pellets, or corn cobs. They’ll even grow on pieces of cardboard or paper bags.
Regardless of what substrate you pick, you will have to treat it before cultivation. Good options for substrate treatment are lime baths, stovetop pasteurization, or cold fermentation.
“Plant” the Spawn
After you have prepared the substrate, it’s mushroom growing time. Technically, this process is called inoculating the spawn.
Inoculation typically involves using a heated syringe to implant the mushroom spawn onto the substrate. While the process can be a little tricky, it sounds harder than it actually is.
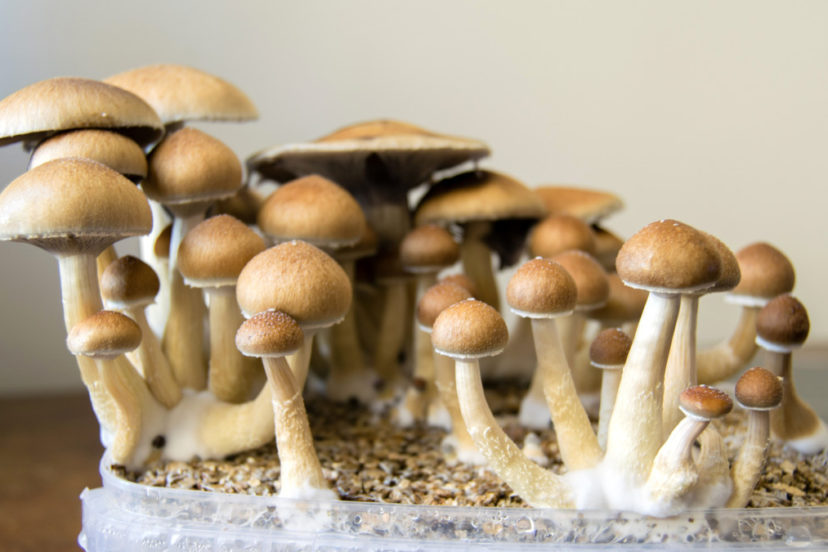
But, if you’re growing oyster mushrooms, no syringes are necessary. All you have to do is mix your spawn and substrate (the latter should be slightly moist), put the whole thing into bags, and spread it over your growing surface.
The substrate mix should then incubate until the bags it’s in become completely white.
Harvest the Mushrooms
Finally, the time has come to fruit and harvest your mushrooms.
First, make a small cut in the bags containing the substrate and spawn mix to allow for airflow. Then put them in a source of indirect light.
Oyster mushrooms do very well in temperatures between 50 and 80-degree Fahrenheit (10 and 25-degree Celsius).
It should take about a week for your mushrooms to start to fruit. Not long after that, the caps of the oysters will begin to flatten out. It will then be time to harvest.
Final Word
Yes, growing your own mushrooms can be a bit challenging, especially at first. But, as you can see, the process is ultimately not that hard. And, if you prefer, you can even bypass most of the steps by using a mushroom grow kit.
By starting small and picking the right variety, you’ll be able to hone your skills quickly and take on some of the more difficult mushroom species in no time.
More to Explore